My FAMLI+ Employer User Guide — Managing Users

Manage User Profiles
The My FAMLI+ Employer dashboard is where you will manage your account. You can make changes and adjust to new ways of working as your company grows and changes. You can also add new users and change permission levels, all from your My FAMLI+ Employer dashboard.
Third Party Administrators: You can add new users and change permission levels, for both your own and your client’s accounts, from your My FAMLI+ Employer dashboard.
If you have a new or current employee who will be responsible for your My FAMLI+ employer accounts, you can create a user account for them from your user dashboard.

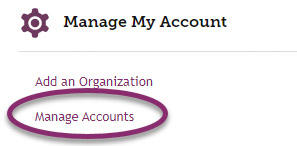
Select the Manage Accounts link to get started.
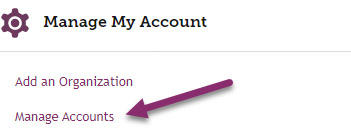
Select the organization to add additional users. Select the account name to be taken to the account page.

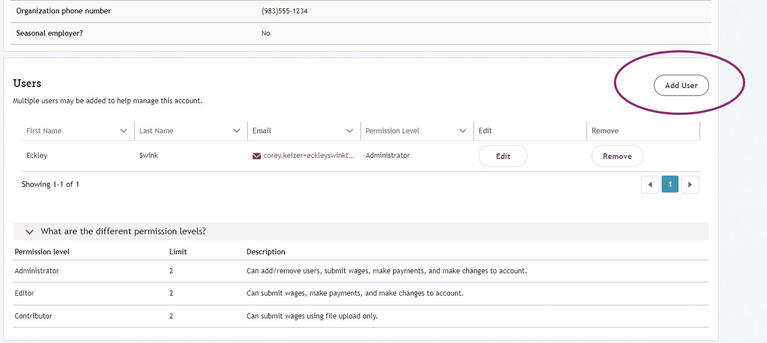
You will be taken to your account information page. Select Add User. You’ll be taken to the Additional Users page. On the Additional Users page, select Add User to open additional fields to enter the new user’s information.
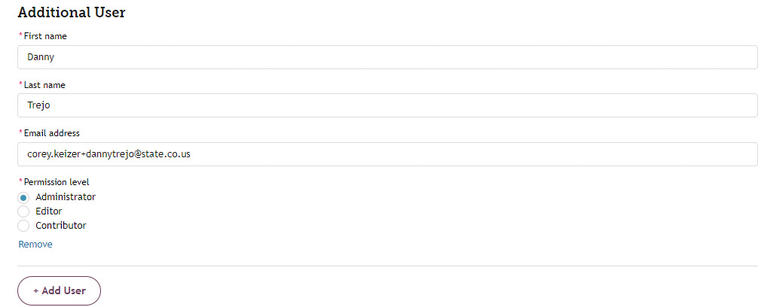
Enter the additional user’s first and last name and email address. If you need to add multiple additional users, select Add User to open more fields. Select the permission level (Administrator, Editor, or Contributor) and select Save.
After selecting Save, you will be taken back to the Account page. The new users will show up in the Users list toward the bottom of this page.

If an employee has requested access to your business account, you will receive an automated system email notifying you of this request. The email will provide a link for you to log in to your My FAMLI+ Employer user account.

Once you have logged in, you can add this employee by following the steps in the Add New User Profiles section of this guide.
Employers Requesting Access to Their My FAMLI+ Employer Account
If an employer that you represent as a TPA is requesting access to their account, they will need to get in touch with your TPA business so they can be added to their account. The Add User workflow for your client accounts is the same as the workflow for adding new users to your own account.
Linking Your TPA Account to an Existing Employer Account
If a client of your TPA organization registers their business on their own in My FAMLI+ Employer, then a link between your TPA account and the employer account must be created.
We recommend that you advise the employer to create the TPA relationship in the portal, a user from the employer with Administrator or Editor access can create this relationship. This process is outlined in this user guide.
You can also create the TPA relationship by uploading a bulk registration file (or via API) referencing that employer account. A bulk registration file can be used for a single employer account or multiple employer accounts. This process will create the proper TPA relationship between the employer account and your TPA account. When this process takes place, the employer will be notified that the relationship was created. If the employer has not yet registered in My FAMLI+ Employer, the employer will be notified that you registered on their behalf and they will be invited to create a My FAMLI+ Employer user account using the email address included in your bulk registration file. This allows employers to self-serve and gain access to their My FAMLI+ Employer accounts from that email address, without needing support from the TPA.
TPAs can request account access to an existing employer account. The request is sent to the employer administrator via email. When the administrator of an employer account adds a TPA through the account management page, a third party relationship will be established.
Note: If the link is not established, your TPA organization will not be able to submit wages or make payments for that client. Instructions for bulk registration can be found in this guide.
Editing Account and Profile Information
Employers that are registered with the My FAMLI+ Employer portal have the ability to make changes to their employer accounts and user profiles through their dashboard in the portal. When changes are made to the account, the primary address and HR benefits contact will receive an email.
From your My FAMLI+ Employer dashboard, select the Manage Accounts hyperlink and select the account you will be making changes to from the Accounts page.

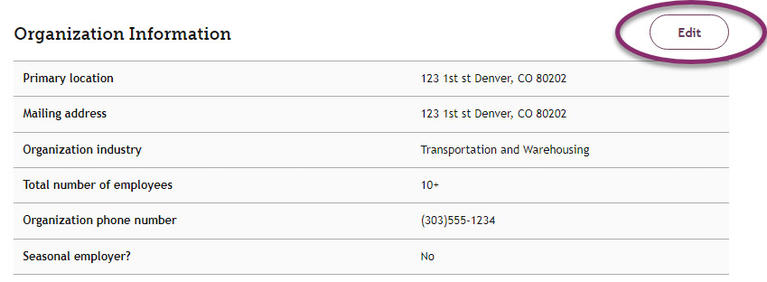
You will be taken to the account details page for that organization. Here, you are able to edit your organization information including:
- Primary location
- Mailing address
- Organization industry
- Total number of employees
- Phone number
- Seasonal employer status
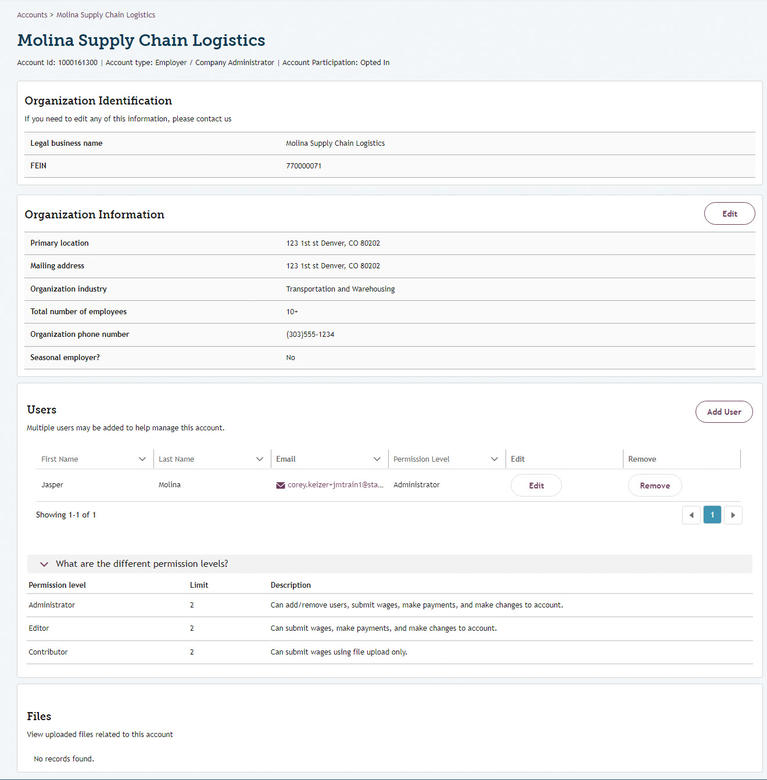
Legal Business Name and FEIN can NOT be changed.
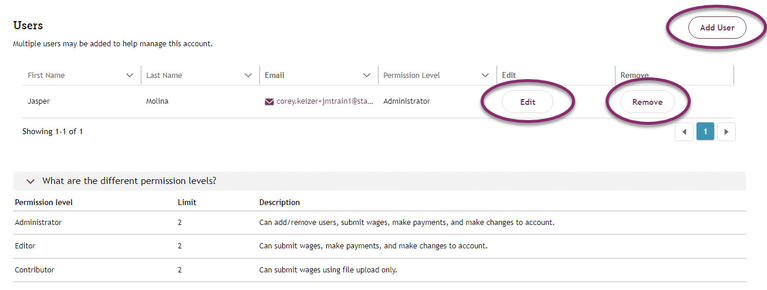
Account administrators can also add users, edit user permission levels and remove users from the employer account as well.
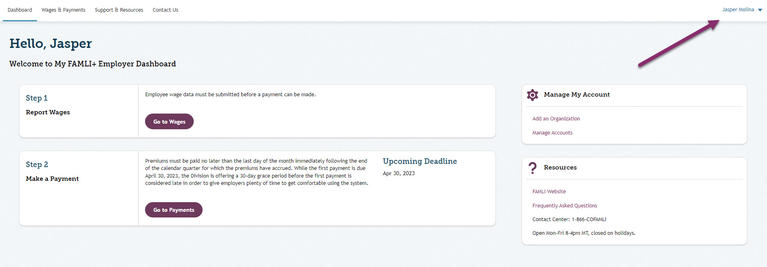
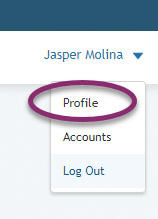
To make changes to your user profile, select your user name in the upper right corner of your dashboard and select Profile from the drop-down menu.
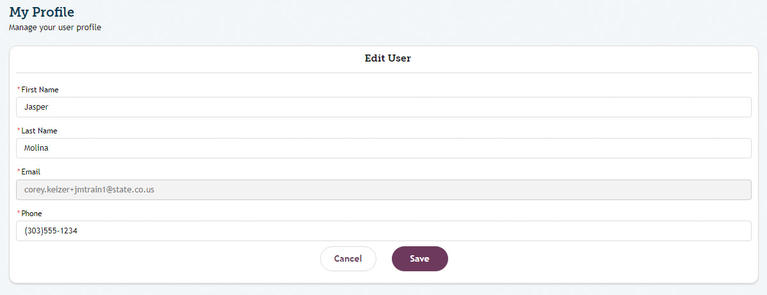
From the My Profile page you can change your first and last name and phone number.
Changing Your Email
Users are not allowed to change the email address in their user profile because it is the key piece of information the account record is tied to and is how your account is linked to Login.gov. If a user needs to change their email, they will need to add themselves as a new user with that new email address.
Once logged in to the portal as your new User, remove your old user by selecting Remove to the right of that user.

Edit User Permission Levels
If you need to edit the permission levels of a user, you can do so from the user list on the account page.
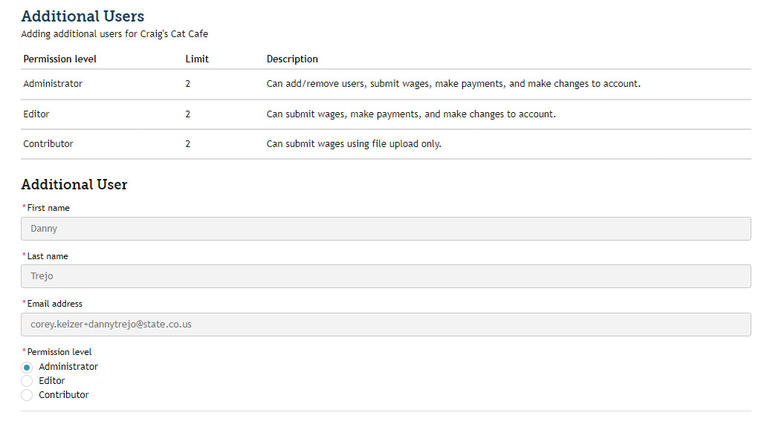
From the user list, find the name of the user whose permission levels need to be changed. Select Edit.

On the Additional Users screen, select the permission level for the user. There are three levels to choose from:
- Administrator: This user type can add and remove users, submit wages, make payments, and make changes to an account. The user who originally created the business account is automatically assigned this permission level.
- Editor: This user type can submit wages, make payments, and make changes to the account.
- Contributor: This user type can submit wages using a file upload only.
This new user will receive an email from My FAMLI+ Employer to complete their registration. They will need to complete the Login.gov registration process to gain access to the business account. Once the new user has completed this process, they will be granted access to the My FAMLI+ Employer account.

If you need to remove a user account from your business account, you can do this from the user dashboard.
From the users list on the account page, find the name of the user you wish to remove and select Remove.

You will get a pop-up dialog box asking you to confirm this action. Select Yes, remove user to complete this action.
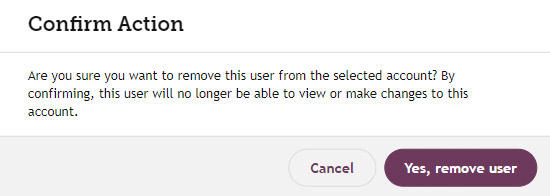
Once this action is completed, your user and list will reflect the change.

Managing Third Party Administrator Relationships
Users with Administrator or Editor access can manage third party administrator (TPA) relationships from the My FAMLI+ Employer portal. Note: Only an Administrator or Editor from the employer can create the third party administrator relationship directly in My FAMLI+ Employer; the third party administrator cannot. A third party administrator can create the relationship with an employer that is already registered in My FAMLI+ Employer by uploading a bulk registration file. We highly recommend including a valid business email address for each employer you serve in your bulk registration file. This will ensure that each business you serve is notified that their third party administrator has registered on their behalf and allows businesses to self-serve and gain access to their My FAMLI+ Employer accounts from that email address, without needing support from the third party administrator. If you do not have an email address for your clients, please leave this field blank.
Log in to your account by visiting the My FAMLI+ Employer portal. Under Manage My Accounts, select Manage Accounts. You will be taken to the Accounts page.
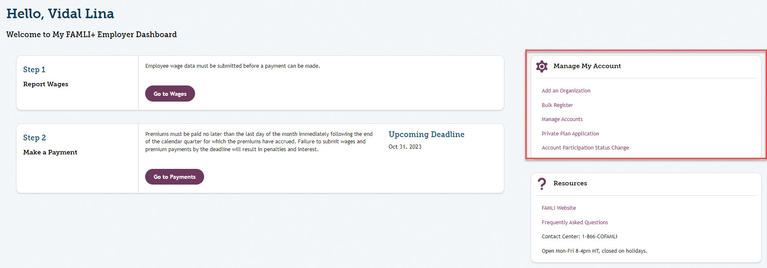
From the Accounts page, search for and select the account for which you’d like to add a third party administrator relationship.

You will now see the details for this account.
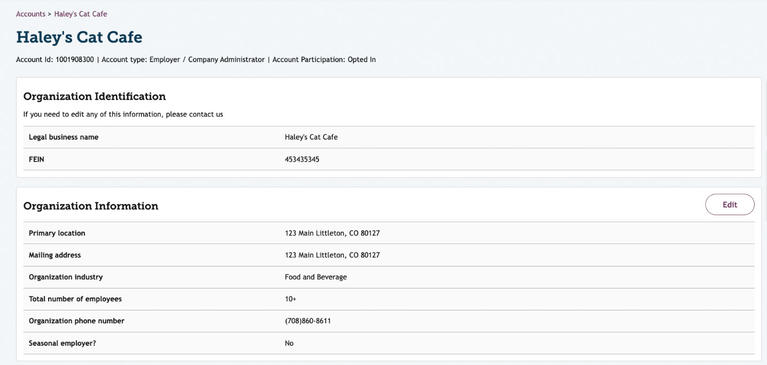
Scroll down to the section titled Third Party Administrator. If you have any current third party administrator relationships in the system, they will appear here. If not, you will see No records found.

To add a third party administrator relationship, select Add. Under Select Account, search for and select the third party administrator that you would like to connect with. If that third party administrator has not yet registered with FAMLI, they will not appear.
Select the start date for the third party administrator relationship. Note that the start date is required, but the end date is not. Ensure your information is correct and select Save.
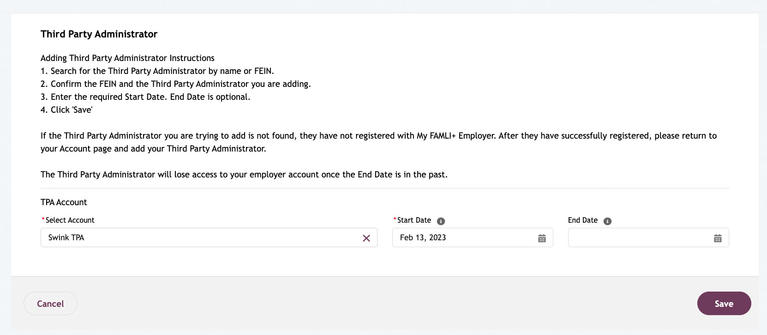
Confirm once more that this information is correct. Select Yes, add TPA.
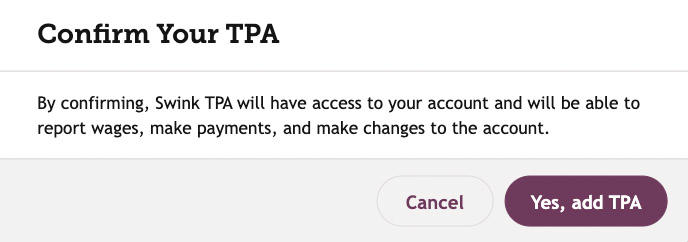
The relationship has been established in the system. You will now see the third party administrator’s information populated in this section of your account’s page.

Note: Both the employer and the third party administrator will receive a notification of changes made in the portal.
Log in to your account by visiting the My FAMLI+ Employer portal.
Under Manage My Accounts, select Manage Accounts.

You will be taken to the Accounts page.

From the Accounts page, search for and select the account for which you’d like to edit a third party administrator relationship. You will now see the details for this account.
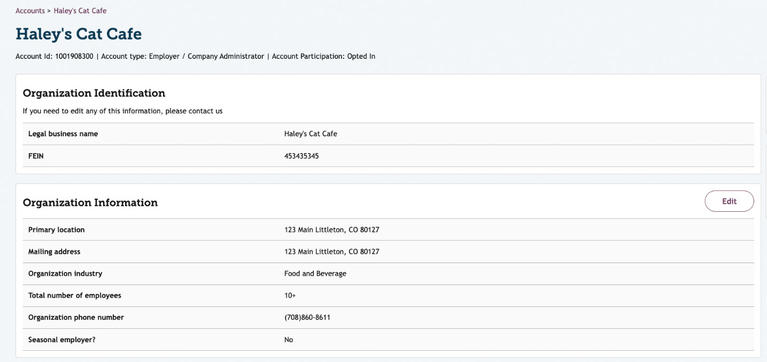
Scroll down to the section titled Third Party Administrator. If you have any current third party administrator relationships in the system, they will appear here. If not, you will see No records found.

To edit a third party administrator relationship, select Edit. To edit, select the pencil icon to the right of the start date. Edit the start and/or end date for the third party administrator relationship and select Save.

You will receive a message that says Success. The Third Party Administrator relationship(s) has been updated. The information will now be updated.

Third Party Administrators: You cannot end your TPA relationship with a client until an administrator-level user from the client has been added to their account. This is required so that accounts will always have an administrator. Their updated information will be reflected on the screen.
Note: Both the employer and the third party administrator will receive a notification of changes made in the portal.
Third party administrators can request account access to an existing employer account. The request is sent to the employer administrator via email. When the administrator of an employer account adds a third party administrator through the account management page, a third party relationship will be established.
Once a third party administrator relationship has ended, the third party administrator will no longer have access to the account.
When editing a third party administrator relationship, if the user attempts to enter an End Date that is BEFORE the Start Date of the relationship, the portal will flag the error.

The error message will provide guidance to the user to select the row circle icon to identify the cause of the error. To correct the error, enter a valid end date for the third party relationship.

Third Party Administrators: Transmitters
If you are a transmitter, your registration workflow will work in much the same way as a TPA. Transmitters will need to provide a limited amount of information to register with the My FAMLI+ Employer portal and will be able to upload wage report files via the API, or by uploading a CSV or XML file from the My FAMLI+ Employer dashboard. Clients of the transmitter will need to register themselves through the My FAMLI+ Employer portal where they will be issued a 10-digit system-generated account number that is specific to Colorado FAMLI. The employer will communicate their FAMLI account number to the transmitter. The Transmitter will include their client’s FAMLI account numbers (sometimes referred to as Account ID or FAMLI ID) when submitting wage reports to the FAMLI program. These submissions can be achieved through the API or by uploading a CSV or XML file from the transmitter’s dashboard. Each upload would most likely include multiple employers in each upload. Transmitters will NOT make payments on their client’s behalf. Payment responsibilities will be communicated to the employer through their own My FAMLI+ Employer account.
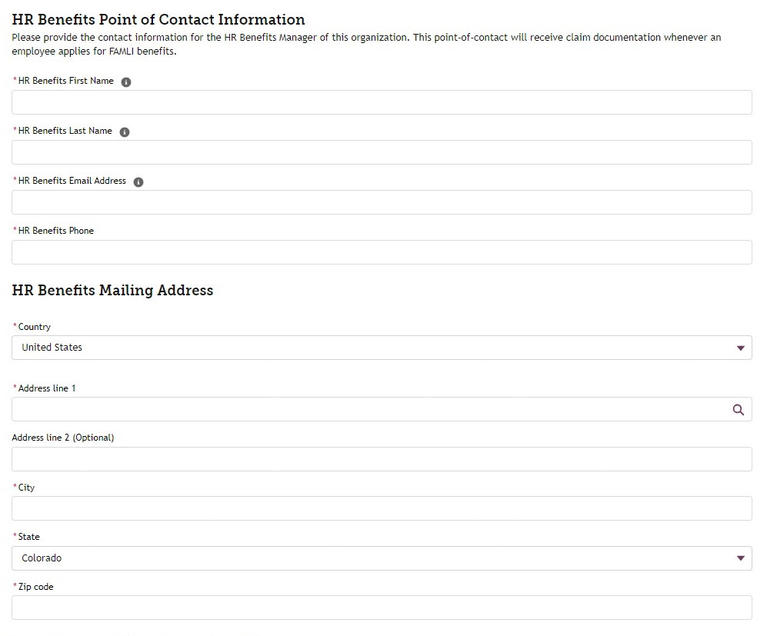
On your account screen, employers can add a point-of-contact to receive claim documentation whenever an employee applies for FAMLI benefits. On the employer dashboard, select Manage Accounts. On the Accounts screen, locate Organization Information. Select Edit.

The additional information screen will appear. You can enter the HR Benefits Point of Contact Information here.
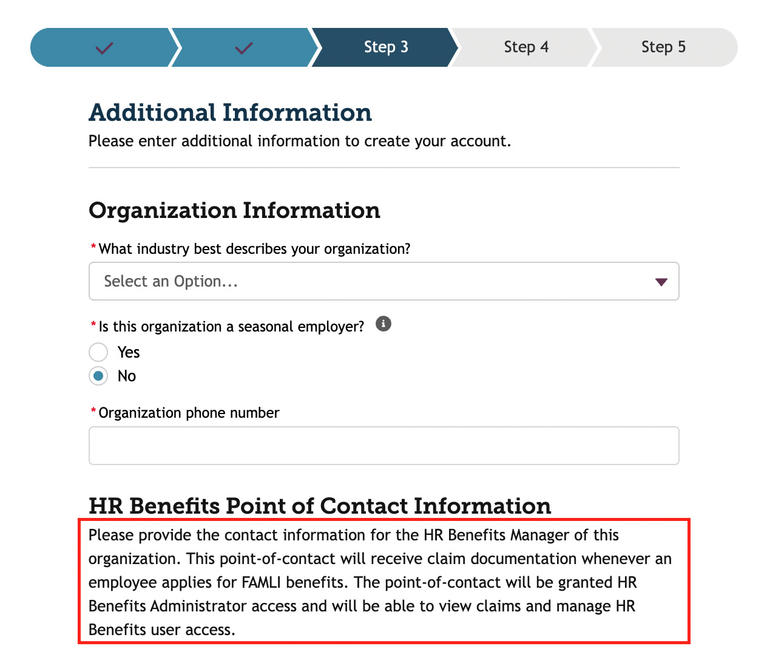
First, you’ll need to create a My FAMLI+ Employer account, following the steps in this guide for authentication, Step 1 and Step 2. In My FAMLI+ Employer Registration Step 3, please provide the contact information for the HR Benefits Manager of your organization. This point-of-contact will receive claim documentation whenever an employee applies for FAMLI benefits. The point-of-contact will be granted HR Benefits Administrator access and will be able to view claims and manage HR Benefits user access.
Portal administrators can add HR benefits contacts in My FAMLI+. Select Manage Account from the dashboard. Next, select Edit in the Organization Information section.
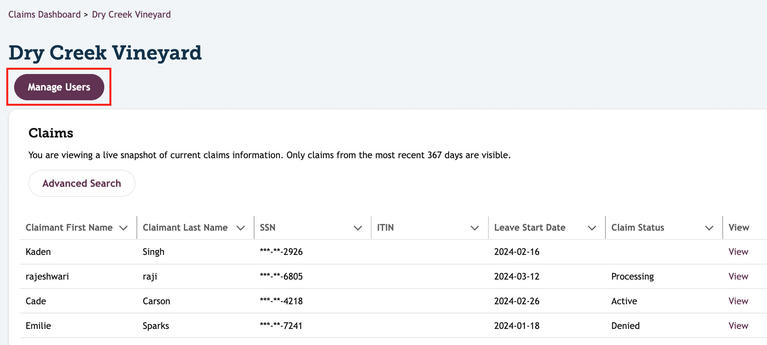
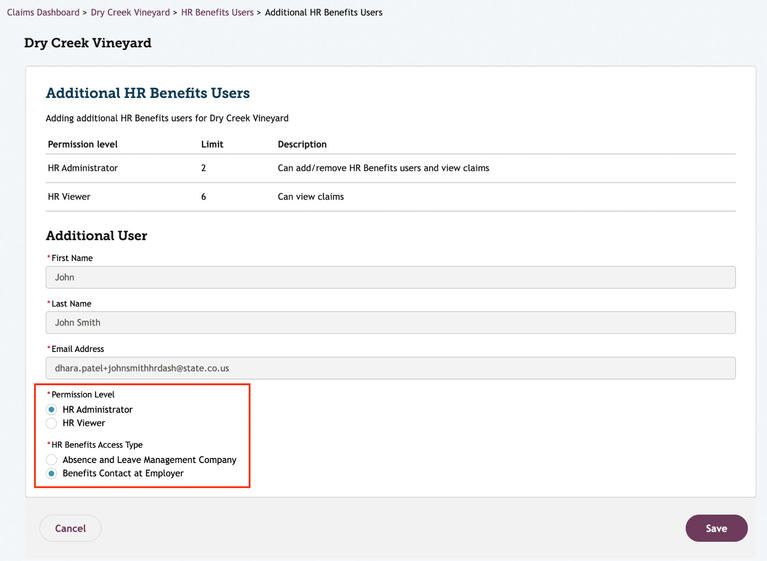
Up to two HR Benefits Administrators and six HR Benefits Viewers can be added per account.

When editing an existing user, only the Permission Level and HR Benefits Access Type are editable.
If an HR Benefits Administrator removes their HR Benefits access, the My FAMLI+ Employer page will display an error Critical error occurred. Please contact support.
When an HR Benefits Administrator clicks on Add Users, the administrator user will be taken to the Add HR Benefits Users page. From this page, the HR Benefits Administrator will be able to add additional users to view claims for the account. Only one user can be added at a time. If the HR Benefits Administrator wishes to add additional HR benefits users, they will need to click Add User again on the Manage HR Benefits Users page. The HR benefits user added will receive an email from FAMLI notifying them they were granted HR benefits access.
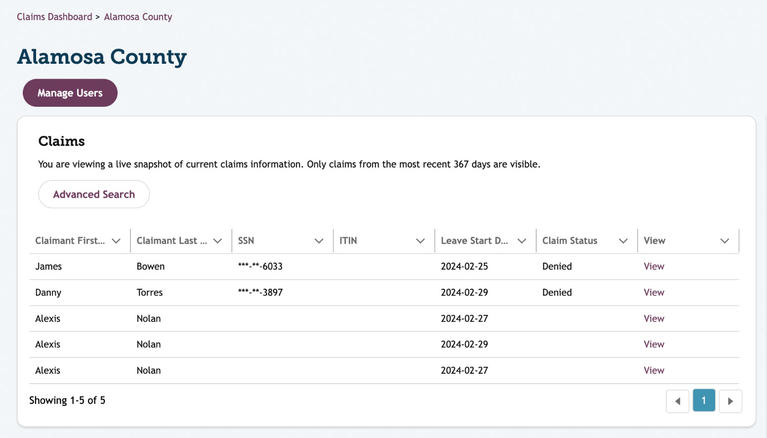
The Claims Dashboard will show employees’ first and last name, SSN/ITIN, start date of leave, claim status and the option to view more information. Clicking View will provide additional leave information such as end date of benefit and benefit amount.
