My FAMLI+ Employer User Guide — Wages & Payments

Wage Reporting
Employers are required to report wages on a quarterly basis. Once an employer has completed the registration process in the My FAMLI+ Employer portal, they will be able to report wages and make payments. Wage reporting can be done manually, or by submitting a wage report document in either XML or CSV format. A technical guide for Wage Report File formats can be found here.
Employers with less than 10 employees are not required to pay the employer share but are still responsible for collecting and remitting the employees’ share on behalf of their employees. Headcount for your company is based on the prior year’s headcount.
Note: Employers that are approved by the FAMLI Division to use a private plan will not be able to submit wage reports for quarters after the start date of the approved private plan.
If you are remitting wages for a small number of employees, you can manually enter wage reports from the main dashboard. From your dashboard, select Go to Wages.
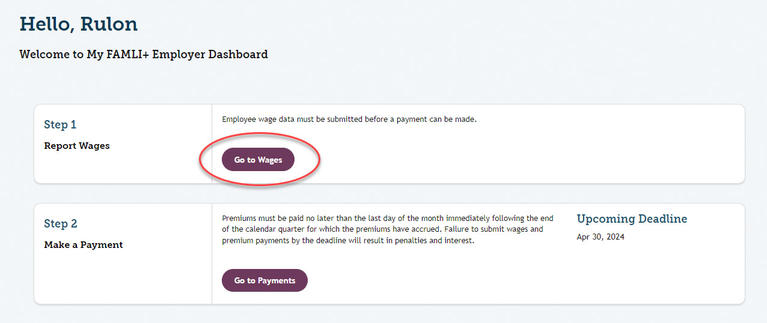
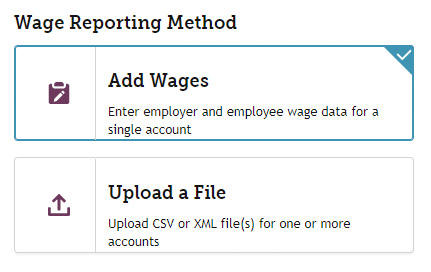
To manually enter wages, select Add Wages and select Continue.
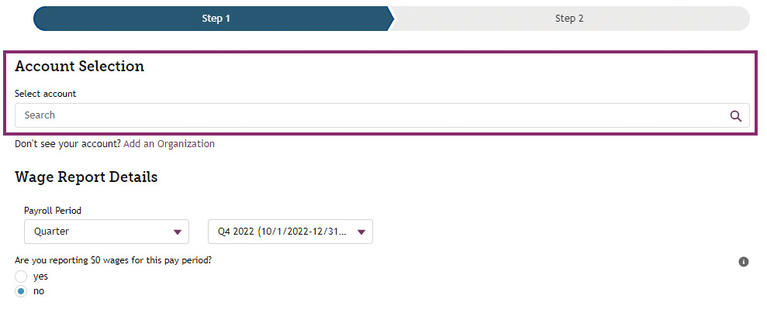
You can search for your organization either by name or FEIN.
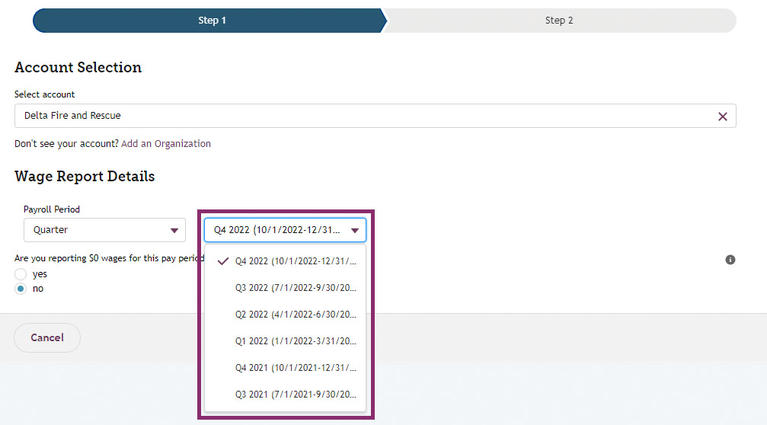
Once you have found the account you need to report wages for, you will need to select the time period (month, quarter, and year) in which you are reporting wages. Select the quarter and year you are reporting wages for and select Continue.
When wages are reported manually, text in red stating Please ensure you are reporting wages for the correct quarter appears under the Payroll Period to ensure that the user is reporting for the right wage reporting period. With the time period selected, enter your employee’s Social Security Number (SSN) or Individual Taxpayer Identification Number (ITIN) followed by first and last name, and gross wages for the quarter selected. Enter the amount withheld. You can withhold $0.00 up to the employee portion percentage of the Subject Wages. When you have selected the correct choice for your employee’s identification number, begin entering their information. Select Add to complete this employee’s entry.
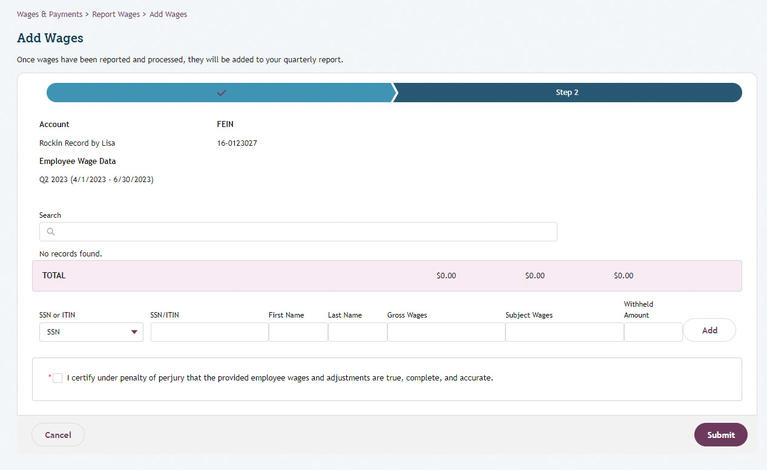
If you have multiple employees to enter, repeat this process until all employees have been entered.
Note: You need to select SSN or ITIN for each employee. When you have entered the wage information for all your employees, select Submit.
The system will provide a Report Summary when you are done submitting wages.

The Copy Employees feature allows employers to replicate employee data from previous quarterly wage reports. This helps ensure consistency and saves time when submitting similar information for consecutive reporting periods. Employers can copy up to 50 employees’ wages that were reported in the previous quarter. Employers must not report zero wages for the current quarter.
Employers will log in to the My FAMLI+ Employer Portal and select the Go to Wages button. Choose the account for which wages are to be reported. If the account meets the eligibility criteria, a prompt will appear with the option to copy employees from the previous quarter. Employee details such as masked tax identification numbers, first initials, and last names will be pre-filled based on the previous report. Review the pre-populated employee list and make any necessary adjustments. Ensure all fields, such as Gross Wages, Subject Wages, and Withheld Amount, are completed as required. After reviewing and updating the employee data, select Submit to finalize the report. A confirmation page will appear, indicating the successful submission of the wage report.
If any mandatory fields are missing or incorrectly filled, an error message will be displayed below the wage entry form. Correct the information before proceeding.
For employers that would prefer to report wages in a document, you have the option to upload a “single filer” wage document. Wage reports can be XML files or CSV files.
Select Go to Wages from your dashboard. When you arrive at the Report Wages page select Upload a File and select Continue.
If this is your first time uploading wage data and you need assistance, you will find resources and a Wages FAQ on this page.
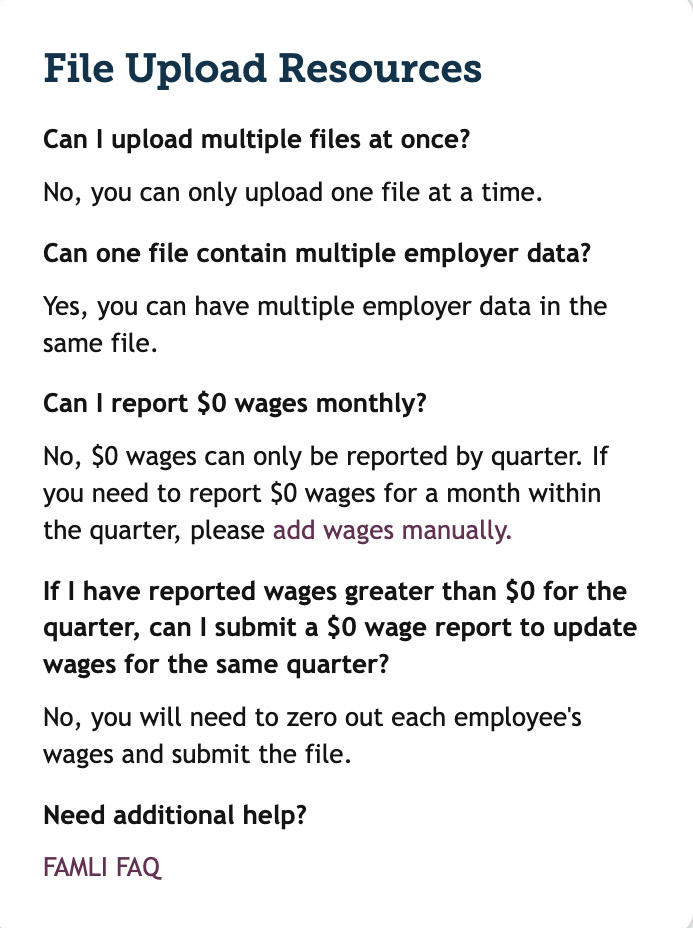
There are also CSV and XML templates available for download, and a link to the Specifications Guide, which offers explanations and important information about how to set up your wage report documents.
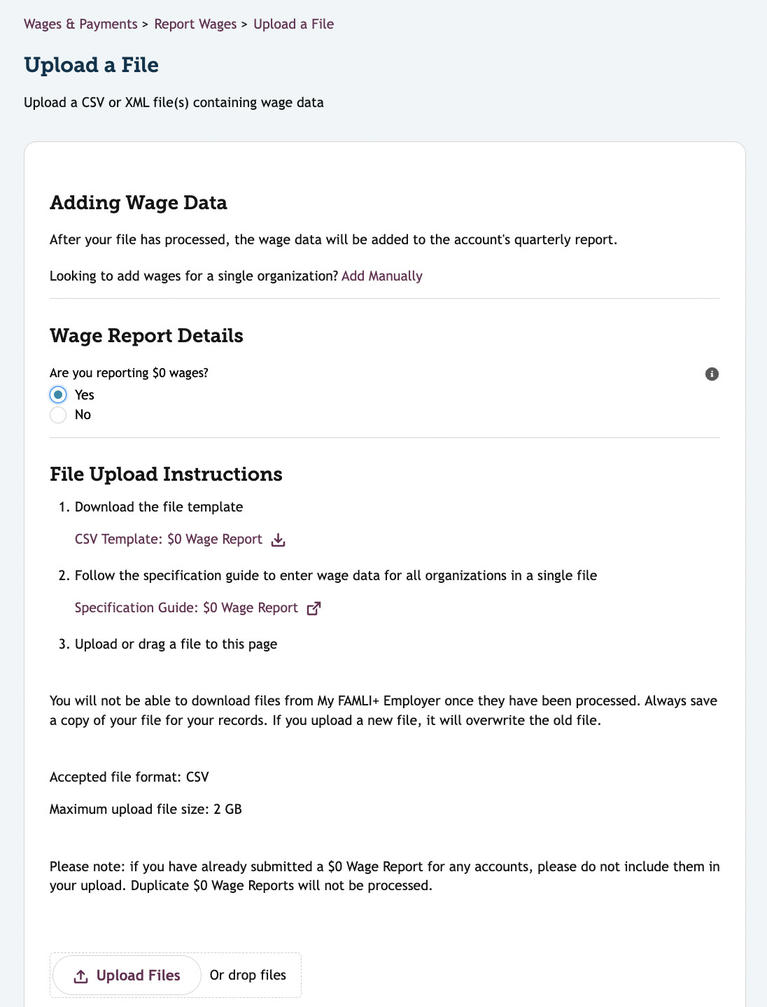
Once your wage report is prepared, you can upload the document by selecting Upload Files. A dialog box will open to show the status of your upload. Once this is complete select Done in the dialog box, and select Submit.
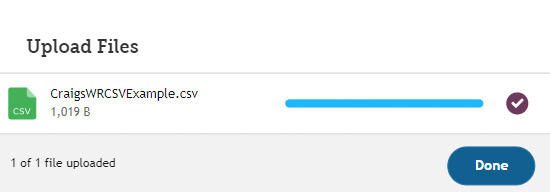
The system will notify you when your file has been submitted successfully.

Wage reports cannot be uploaded until the employer has been verified. Employer verification can happen immediately or may take up to a week. Every employer is different, and the amount of time verification takes will vary.
Wage reports submitted by self-employed and employees of opted-out local governments will require wage-verification documentation to be submitted as well.
Once you have entered your employee wage information or uploaded a wage report, you will be able to view the wage reports by quarter. From the employer dashboard, navigate to Wages & Payments. You will see your account name along with your FEIN, wages, balances, and status. In the upper right, you will see the deadline for submitting wage reports for the current quarter.

By selecting the account name, you will be brought to your wage report list, which is sorted by quarter. Here, you will see the total subject wages, premiums owed, any penalties that have accrued, your balance, and the payment status.

Administrators and editors linked to the Employer account can view wage reports by selecting View. Users can use Edit Wages to make wage-related edits.
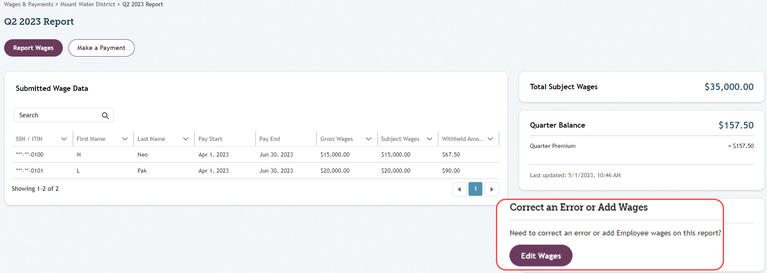
Note: For security purposes, a third party administrator cannot view detailed wage reports in the portal for clients they represent.
Selecting Edit Wages takes you to the Report Wages page. Here users can select Add Wages, then choose the payroll period they are reporting wages for, then select Continue. This takes you to the page that will display previously reported employees’ SSN/ITIN, first and last names, gross wages, and withheld amounts. Users then can add additional employee information or edit gross and withheld amounts by selecting the pencil icon next to the chosen column.
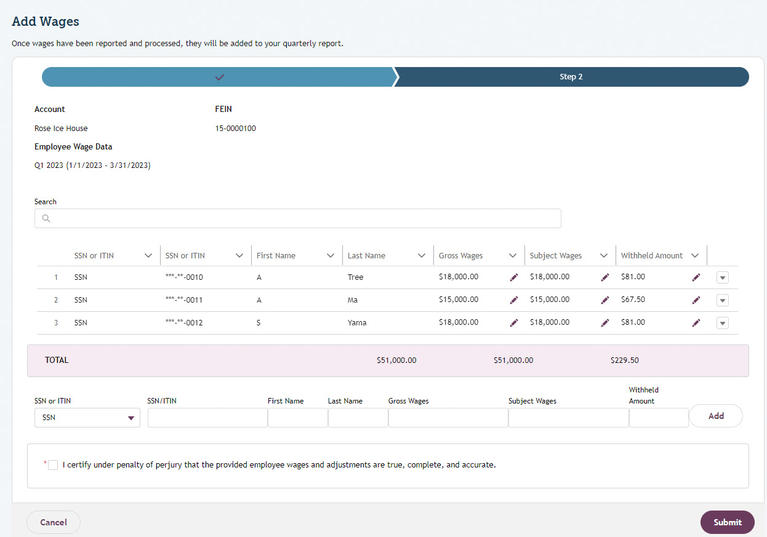
Users can add employee information again and select Submit to overwrite previously reported data. In this case, the pop-up window will indicate Existing Record Found and provide options to Cancel or Overwrite. If you select Overwrite, the system will save the newest report.
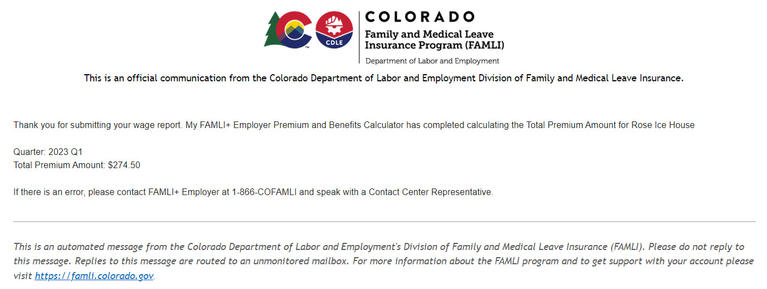
Users will receive an email notification about an updated wage report.
Bulk Uploading Wage Reports
Under most circumstances, TPAs should take the opportunity to bulk upload wage reports. Wage reports can be CSV or XML files. Resources for TPAs, including wage reporting file specifications, can be found on our TPA page.
There are a number of ways you can reach the wage report upload page from the dashboard. If you do not need to review the status of your client accounts or take any other actions on your client accounts select Go to Wages from the TPA dashboard.

Choose Upload a File for the wage reporting method and select Continue.
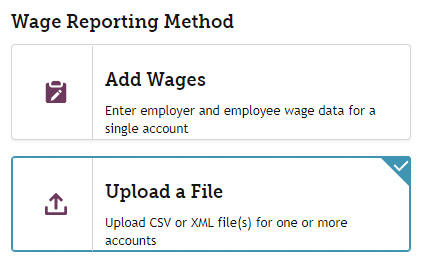
From the Adding Wage Data page, select Upload File.
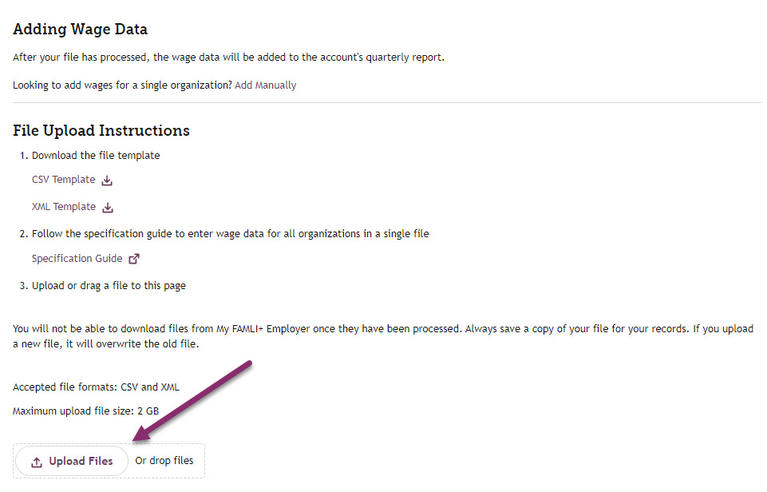
An Upload Files dialog box will open, showing the progress of your upload. Select Done and select Submit once this dialog box closes.
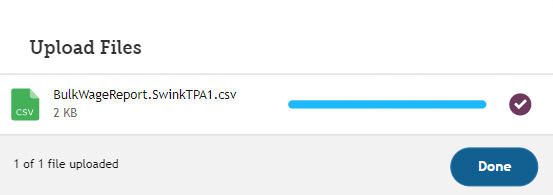
The system will notify you when your file has been uploaded successfully.

The system will generate error messaging differently depending on the file type used for your bulk wage report. For a list of bulk registration and wage reporting error messages and what they mean, see the System Generated Error Messaging section of the appendix.
Viewing Wage Reports
Once you have entered employee wage information or uploaded a wage report you can view your wage reports by quarter. From the main dashboard, navigate to the Wages & Payments dashboard. If you are a TPA with employees in Colorado and are managing your TPA employer account and your clients as one user, you will see your employer account as well as the accounts of your clients. In the upper right, you will see the deadline for submitting wage reports for the current quarter.
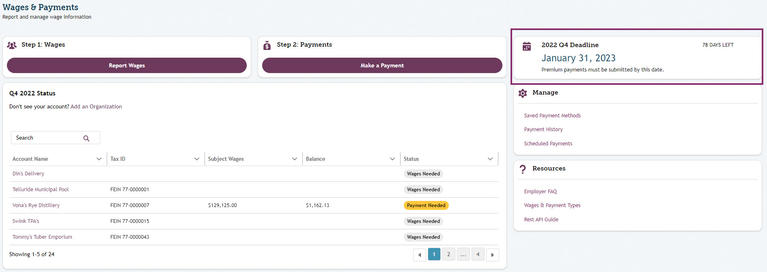
By selecting the account name, you will find your wage report list, which is sorted by quarter. Here, you will see the total subject wages, premiums owed, any penalties that have accrued, your balance, and the payment status.

Administrators and editor users linked to the employer account can view wage reports by selecting View. Users can select Edit Wages to make wage related edits.
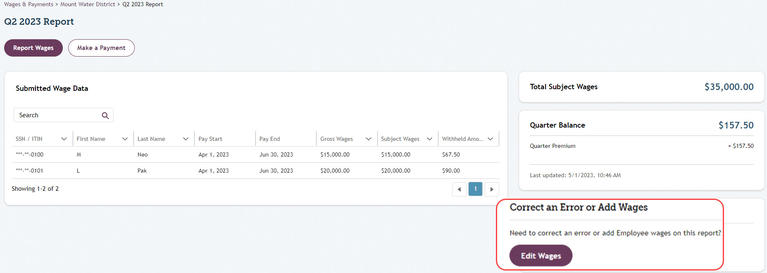
Note: For security purposes, a TPA cannot view detailed wage reports in the portal for clients they represent.
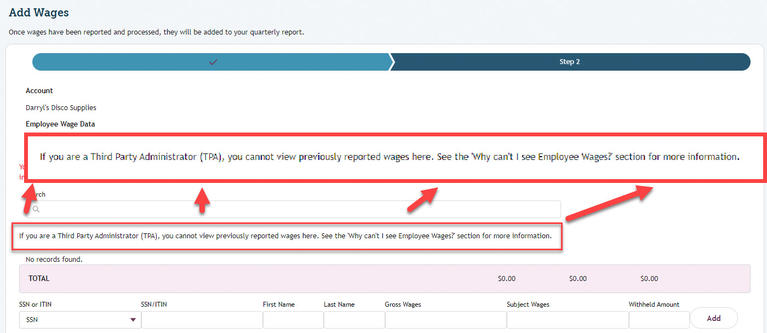
Selecting Edit Wages takes you to the Report Wages page. Here users can select Add Wages, choose the payroll period they are reporting wages for, then select Continue. This takes you to the page that will display previously reported employees’ SSN/ITIN, first/last names, gross and subject wages, and withheld amounts. Users then can add additional employee information or edit gross wages/withheld amounts by selecting the pencil icon next to the chosen column.
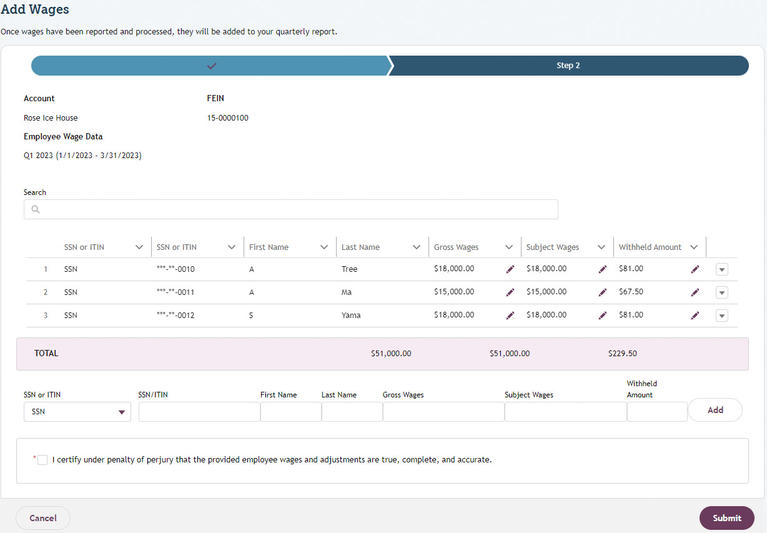
Users can add employee information again and select Submit to overwrite previously reported data. In this case, the pop-up window will indicate Existing Record Found and provide options to Cancel or Overwrite. If you select Overwrite, the system will save the newest report. Users will receive an email notification that a wage report has been updated.

Amendments are any changes to wages that are made after the grace period for the quarter has passed. Users can submit amended wages in My FAMLI+ Employer through a bulk upload or via API. The detailed quarterly wages page includes two buttons: Submit Amendment and View Amendments.
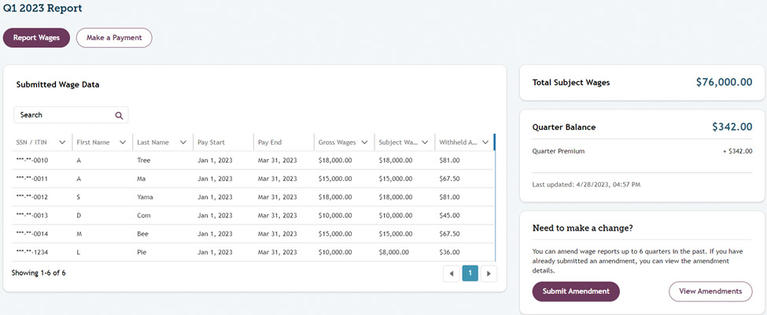
Users can submit or view amendments on the quarterly wage report page for a past-due quarter. Select Submit Amendment to amend wages, and select View Amendments to see previous changes to wages for the quarter. Users go through the regular wage workflow to submit amendments for quarters with past due dates.
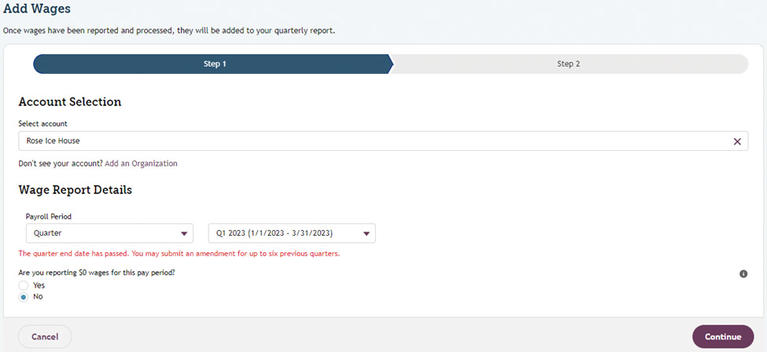
If the user is making an amendment to an existing wage record, the system will show that with a pop-up screen: Existing Record Found. If changes are needed, select Overwrite.

The portal will send a confirmation email when submitted amended wages are processed.
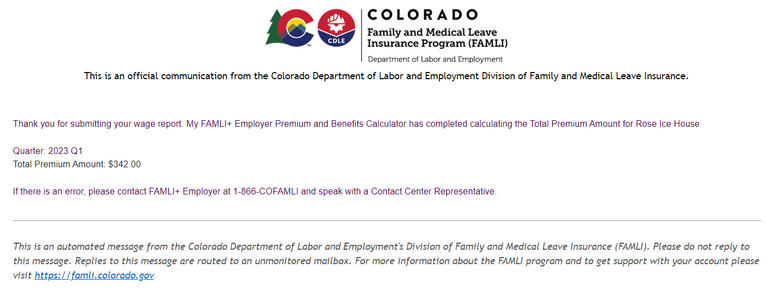
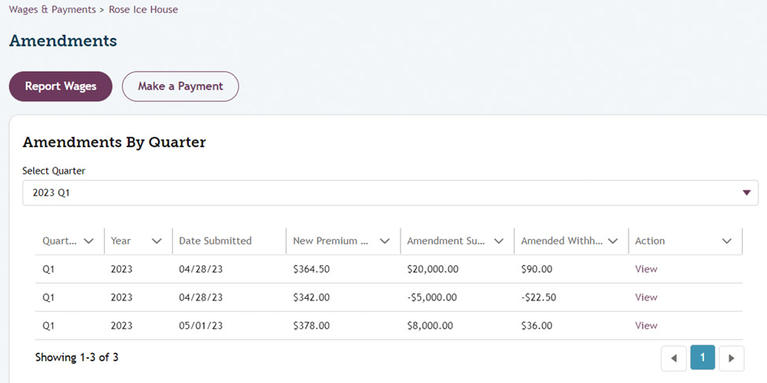
Every wage report submission creates a new amendment record. If wages were amended in only one transaction, only one amendment will be generated by the system.
Premiums must be paid no later than the last day of the month immediately following the end of the calendar quarter for which premiums have accrued. Penalties and interest will be assessed for delinquent premiums.
Interest
Interest is charged at the rate of 0.66667 percent per month on all late premium charges and any penalties. We do not prorate for any portion of the month but, instead, charge for the entire month on the first date of each month. Interest continues to accrue at the rate of 0.66667 percent per month on any unpaid balance.
Penalty
Penalties are assessed for late quarterly wage reports and/or past-due premium charges.
- Late Wage Report Penalty: We assess a penalty on all wages reported late. The penalty is $5 per individual based on the number of employees reported in the most recently reported quarter. For a new employer with 1-9 employees, the penalty is $25 per occurrence. For a new employer with 10 or more employees, the penalty is $50 per occurrence. For individuals electing coverage, the penalty is $5 per occurrence.
- Amended Wage Penalty: We assess a penalty on all wage amendments that increase the premiums attributable to an individual’s wages by 25% or more. The penalty is $5 per individual wage amendment.
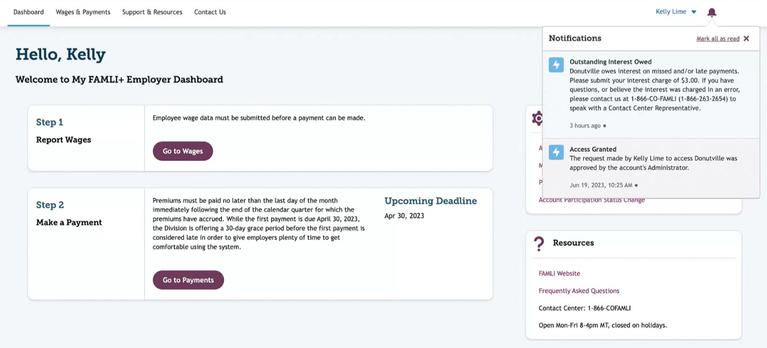
In addition to email notifications, users will see notifications directly in the portal on the dashboard, which will show any amended-wage penalties, late wage report penalties, and outstanding interest due.
Payments
Employers may collect the employees’ share of the FAMLI premium through a simple payroll deduction. FAMLI is funded by both employers and employees based on the employer plus employee portion percentage of wages, half paid by the employer and half paid by the employee. Employers are responsible for submitting both their share (if required) and their employees’ share of the premium to the FAMLI Division once a quarter.
Users can elect to make payments in the My FAMLI+ Employer portal. You will need to access the Make a Payment workflow from the main dashboard or the Wages & Payments dashboard. Below is a step-by-step guide to making payments starting from the main dashboard.
Note: For additional payment instructions including API, ACH credit and online bill pay, please visit our Employers Page and select Paying Your Premiums.
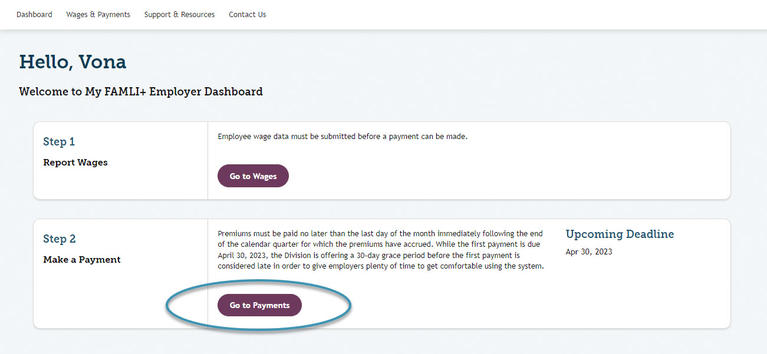
Employers have the opportunity to pay their premiums manually from the main dashboard. From the Dashboard select Go to Payments.
You will be taken to the payment page where you will search for your account.

Note: In the Payment Resources section you can see how payments are applied. Payments are applied to your balance from the oldest to most recent quarter, in the following order: fines and penalties, fees, interest, and then premiums.
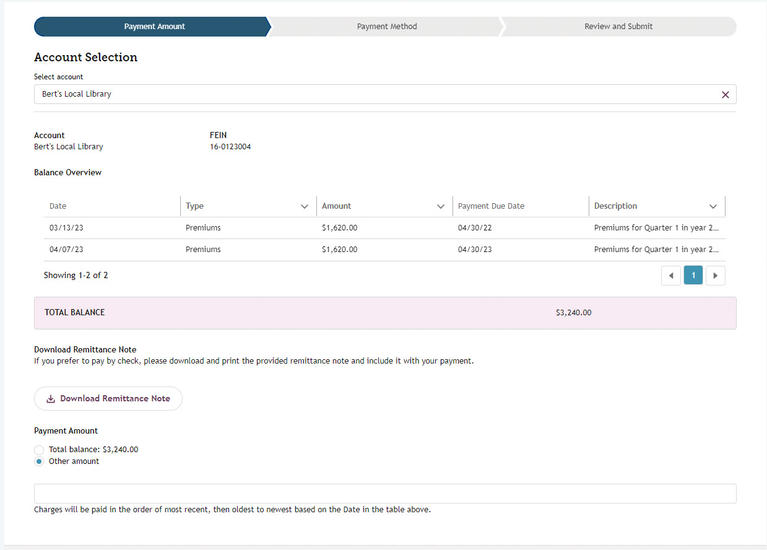
Once you have selected the account you wish to make a payment for, your Account Information and Balance Overview will appear. You will have the option to pay the total amount, or to choose another amount you wish to pay. Select the amount you wish to pay and select Continue. If you choose Other Amount, you will be prompted to enter the amount.

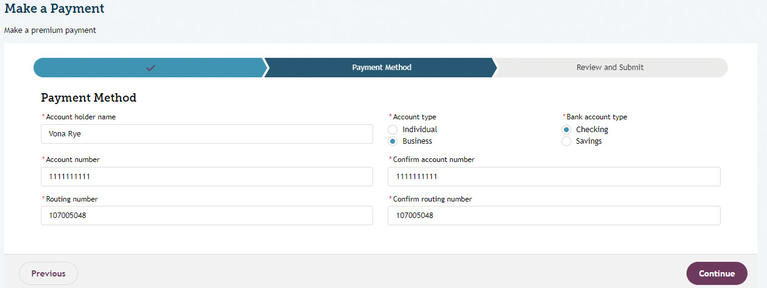
When you arrive at the Make a Payment page, you will be prompted to enter account information. Include the account holder’s name, account type, bank account type, account number, and routing number. The system will prompt you to confirm your account and routing numbers.
If your account accumulated penalties and interest, the list of those penalties and interests will be shown in a table including the following information: date, type, amount, due date, and description.
When you have successfully submitted your payment method, you will have the opportunity to review your payment. Check the box to attest that all your information is correct and select Submit.
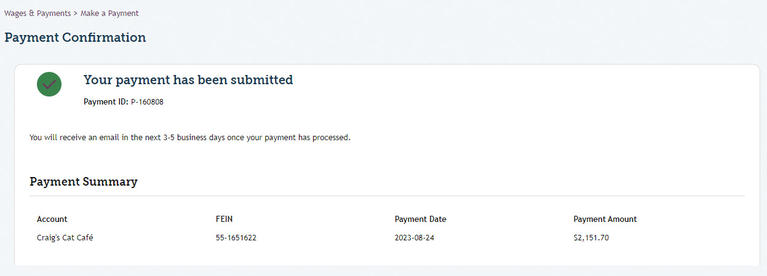
You will receive confirmation of your payment submission. This screen will include a payment summary.
Managing payment methods in My FAMLI+ Employer includes Adding a New Payment Method, Editing Existing Payment Methods, Setting Default Payment Methods, and Removing Payment Methods.
Adding a New Payment Method: Navigate to the Manage Payment Methods section in the Portal. Select Manage Accounts from the account dashboard. Select the account name to add a payment method. Select Payment Methods from the Payments card on the right. Select Add New Payment Method.
- Enter the required bank details:
- Name on the account
- Bank institution name
- Account number (visible only to system administrators)
- Routing number
- Set whether the payment method should be used for Premium Payments and/or Refunds.
- Select Save. The payment method will now be available for use.
Editing a Payment Method: From the Manage Payment Methods page, select the payment method you wish to edit. Update the necessary details (e.g., account nickname, bank institution, or account type). If changing the account number or routing number, ensure the new details are accurate. Click Save to apply changes.
Setting Default Payment Method: For both Payments and Refunds, a default payment method must be selected. From the Manage Payment Methods page, select a default payment method. Toggle the Default for Payments or Default for Refunds checkbox. Only one payment method can be set as the default for each category at a time. Click Save to finalize your changes.
Removing Payment Method: Navigate to the Manage Payment Methods page. Select the payment method you wish to remove. Set the Status to Removed. Enter the reason for removing the payment method in the Removed Reason field. Select Save. The method will no longer be available for payments or refunds.
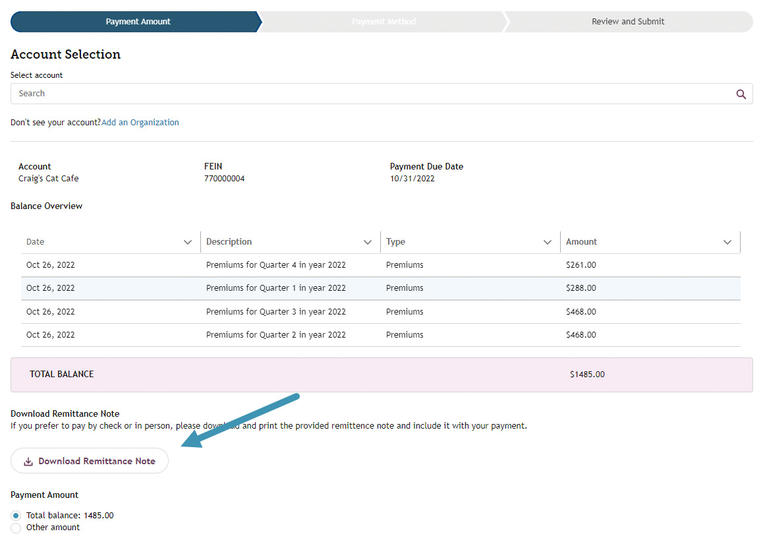
If you wish to make payments by check, you can do so by downloading the Remittance Note. Complete this document and return it to the Division of Family and Medical Leave Insurance. The Remittance Notice can be downloaded from the main dashboard. From the main dashboard, select Go to Payments.
Search for your account using your FEIN or a keyword from the business’s name. When your account has loaded, find Download Remittance Note in the lower left corner of your screen. When you select this button, a PDF of the Remittance Note will open in a new tab.
Mail the check and your Remittance Note to the following secure PO Box address:
Division of Family and Medical Leave Insurance
PO BOX 5070
Denver, CO 80217-5070
Include your 10-digit FAMLI account number on the check memo.
An Installment Payment Agreement (IPA) is a financial arrangement that allows employers to pay off their owed amounts in smaller, manageable installments over a set period rather than paying a lump sum. You can initiate the process to start an installment payment agreement by calling FAMLI and requesting to set up an IPA. FAMLI will call you back to discuss the terms of the IPA. Payments for your IPA can be made in the wages and payment screen.
To view payment history, navigate to your Wages & Payments dashboard and select Payment History.

You will be taken to the Payment History page, where you can view all previously made payments as well as any failed payments, which are indicated by a status Payment Error.

If an organization has opted out of FAMLI participation and wishes to remit payments on behalf of an employee who has opted in to FAMLI participation, that organization will follow the normal workflow for submitting payments
The Make a Payment workflow for local governments remitting on behalf of employees of opted-out local governments (EOOLG) is designed to work with the current payment workflow experience.
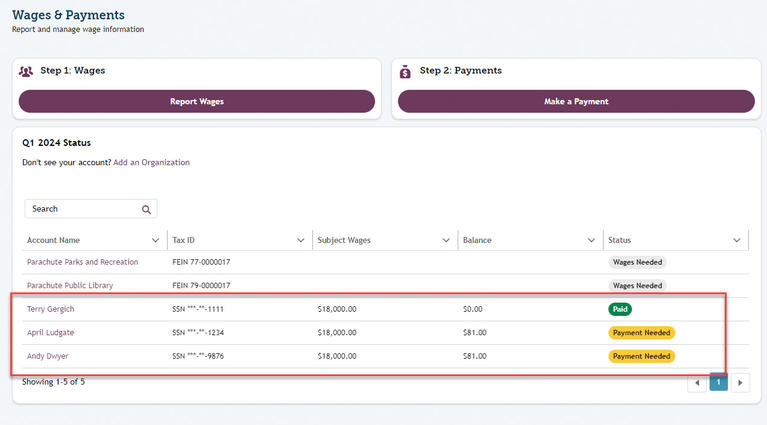
From Step 1 of the Make a Payment workflow, the local government employer can search/select for EOOLG accounts. If an EOOLG has authorized access to the local government employer by providing remitting start and end dates, and today is within that date range, the EOOLG account will appear as an option. If the remitting start and end date range is before or after today, the EOOLG account will not appear as an option.

After selecting the EOOLG account, the local government employer can make a payment for any open receivable item listed, regardless of whether or not the receivable item is tied to a quarter outside of the remitting start and end date period.
